Fail2Ban is a neat tool that watches your logfiles and executes actions defined by you if a filter matches. In the following I want to explain the basic functionality of fail2ban necessary to integrate with WordPress and we will install Slack notifications: 
Basics
Jails
Jails are like configurations for services you want to monitor. You declare services and specify filters, ports, protocol … for them.
Filter
Filters are usually regular expressions that run over your logfiles to detect failed logins. For example a filter could find matches for Authentication failure in your apache access logs. This would match lines like this:
Oct 10 13:45:16 s17713764 wordpress(no3x.de)[27974]: Authentication failure for admin from 87x.20x.16x.16x
Fail2Ban can extract the IP out of this and ban if it has generated maxretry during the last findtime.
Actions
You can react to matches of a filter by actions. Actions can hook into the following events: actionstart, actionstop, actioncheck, actionban, actionunban.
There are actions like:
- iptables-multiport ( actions for manipulation of the iptables )
- sendmail ( actions for mail notifications )
- also slack (we will create later)
Installation
I assume you have already installed fail2ban. If not there is a good guide at digitalocean.
To get these logs entries when somebody tries to login you need to install the WordPress plugin WP fail2ban on all WordPress installations you want to secure on your server.
Filter
Download the filter provided by the plugin. The plugin creates log entries that are matchable by the filter:
wget -O /etc/fail2ban/filter.d/wordpress.conf http://plugins.svn.wordpress.org/wp-fail2ban/trunk/filters.d/wordpress-hard.conf
Feel free to take a look into it to understand the magic:
cat /etc/fail2ban/filter.d/wordpress.conf
Jail
Place this in a file at /etc/fail2ban/jail.d/wordpress.conf
[wordpress]
enabled = true
filter = wordpress
logpath = /var/log/auth.log
port = http,https
maxretry = 3
findtime = 10800
bantime = 86400
As described above this is a service definition where we put some things together:
filter which filter to use
logpath file to run the filter on
maxretry tries to log in
findtime time frame (see image below)
bantime time the used is banned
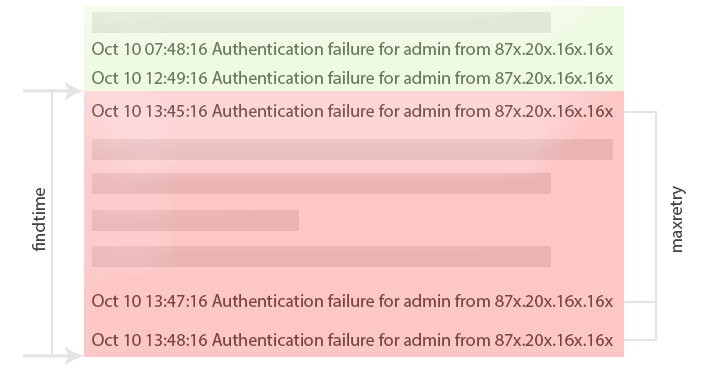
With findtime you specify a time frame (red area) for fail2ban in which it will look for entries. Only entries in the read are taken into account. Entries in the green area are not recognized. Therefore only entries in the red area are counted and compared to maxentry . If it exceeds maxentry then it will fire actionban.
Finish
Restart fail2ban service with:
sudo service fail2ban restart
After this steps you installed fail2ban for WordPress already! Open a browser and cause a ban for yourself. When you are banned the website will not respond to your request at all. This is caused by the rule that is added to the iptables – it rejects any request from your IP.
You can verify this by executing iptables -L – this fill print something like:
Chain fail2ban-wordpress (1 references)
target     prot opt source               destination
REJECT     all  --  yourIPorSharedIPdomain  anywhere             reject-with icmp-port-unreachable
RETURN     all  --  anywhere             anywhere
Slack Integration
Instead of sending mails you can post notifications to slack.
Setup a WebHook
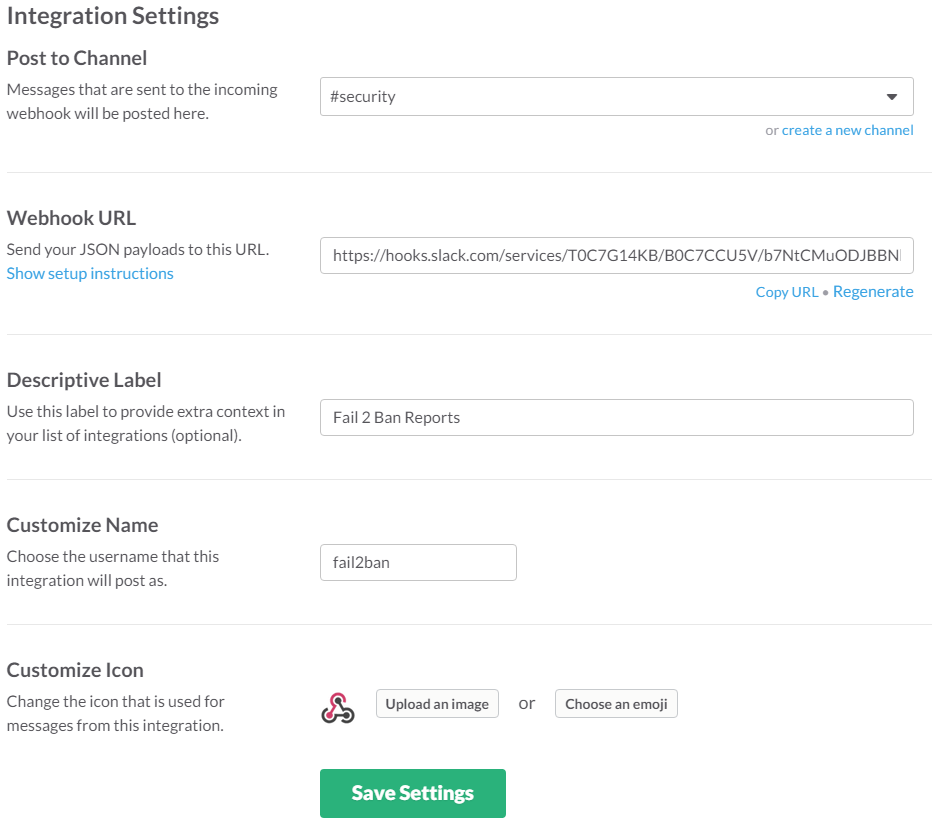
You need to setup a Incoming WebHook at Slack.com. Below you can find my integration setup. I decided to create a new channel #security for this kind of notifications. The important information are the channel and the webhook url. Label, name and icon are just for formatting.
Familiarize with WebHook API
Let’s try it! Yo just have to replace the last parameter with your actual Webook URL. From your sever execute:
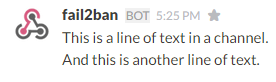
curl -X POST --data-urlencode 'payload={"text": "This is a line of text in a channel.\nAnd this is another line of text."}' https://hooks.slack.com/services/T0C7G14KB/B0C7CCU5V/b7NtCMuODJBBNxxxxxxxxx
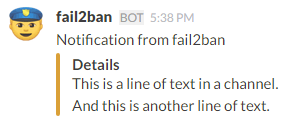
In your channel you will see this:
We can also change the icon by this request by adding a icon_emoji key-value.
curl -X POST --data-urlencode 'payload={"text": "This is a line of text in a channel.\nAnd this is another line of text.", "icon_emoji": ":cop:"}' https://hooks.slack.com/services/T0C7G14KB/B0C7CCU5V/b7NtCMuODJBBNxxxxxxxxx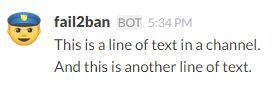
To make it a bit more complicated I decided to add an attachment to this message. This also provides an option for a coloured bar you can modify. There are a lot of more things you can customize and integrate!
curl -X POST --data-urlencode 'payload={"text": "Notification from fail2ban", "icon_emoji": ":cop:", "attachments":[{"fallback":"This is a line of text in a channel.\nAnd this is another line of text.","color":"warning","fields":[{"title":"Details","value":"This is a line of text in a channel.\nAnd this is another line of text.","short":false}]}]}' https://hooks.slack.com/services/T0C7G14KB/B0C7CCU5V/b7NtCMuODJBBNxxxxxxxxxThe payload formatted:
{
	"text": "Notification from fail2ban",
	"icon_emoji": ":cop:",
	"attachments": [{
		"fallback": "This is a line of text in a channel.\nAnd this is another line of text.",
		"color": "warning",
		"fields": [{
			"title": "Details",
			"value": "This is a line of text in a channel.\nAnd this is another line of text.",
			"short": false
		}]
	}]
}
Integrate into fail2ban
Until now we just send dummy messages that have nothing to do with fail2ban. Now we will create a new action for slack notifications!
# Fail2Ban configuration for Slack Notification
# Author No3x
# Author Based on Tim Nash
#
[Definition]
# Option: actionban
# Notes: Command executed when banning IP.
# Values: CMD
actionban = curl -X POST --data-urlencode 'payload={"text": "Fail2Ban Report", "icon_emoji": ":cop:", "attachments":[{"fallback":"The IP <ip> has just been banned by Fail2Ban after <failures> attempts against <name>","color":"warning","fields":[{"title":"<name>","value":"The IP <ip> has just been banned by Fail2Ban after <failures> attempts against <name>.","short":false}]}]}' https://hooks.slack.com/services/T0C7G14KB/B0C7CCU5V/b7NtCMuODJBBNxxxxxxx
# Avoid warnings
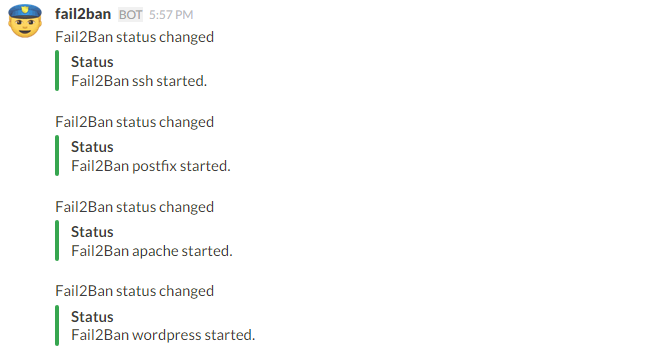
actionstart = curl -X POST --data-urlencode 'payload={"text": "Fail2Ban status changed", "icon_emoji": ":cop:", "attachments":[{"fallback":"Fail2Ban <name> started","color":"good","fields":[{"title":"Status","value":"Fail2Ban <name> started.","short":false}]}]}' https://hooks.slack.com/services/T0C7G14KB/B0C7CCU5V/b7NtCMuODJBBNxxxxxxxx
actionstop =
actioncheck =
actionunban =
[Init]
# Default name of the chainI hook into actionban to create a message like this:
and actionstart
To make this work we need to register the slack action. I decided to make it as default action. Change your /etc/fail2ban/jail.local to this:
#
# Action shortcuts. To be used to define action parameter

# The simplest action to take: ban only
action_ = %(banaction)s[name=%(__name__)s, port="%(port)s", protocol="%(protocol)s", chain="%(chain)s"]

# ban & send an e-mail with whois report to the destemail.
action_mw = %(banaction)s[name=%(__name__)s, port="%(port)s", protocol="%(protocol)s", chain="%(chain)s"]
              %(mta)s-whois[name=%(__name__)s, dest="%(destemail)s", protocol="%(protocol)s", chain="%(chain)s", sendername="%(sendername)s"]

# ban & send an e-mail with whois report and relevant log lines
# to the destemail.
action_mwl = %(banaction)s[name=%(__name__)s, port="%(port)s", protocol="%(protocol)s", chain="%(chain)s"]
               %(mta)s-whois-lines[name=%(__name__)s, dest="%(destemail)s", logpath=%(logpath)s, chain="%(chain)s", sendername="%(sendername)s"]

action_andslack = %(action_)s
                  slack[name=%(__name__)s, port="%(port)s", protocol="%(protocol)s", chain="%(chain)s"]


# Choose default action.  To change, just override value of 'action' with the
# interpolation to the chosen action shortcut (e.g.  action_mw, action_mwl, etc) in jail.local
# globally (section [DEFAULT]) or per specific section
#action = %(action_)s
action = %(action_andslack)s
Note the highlighted lines that indicate changes/additions. action_andslack contains the ban action and slack action now. slack[name=%(__name__)s will pass the name of the current jail appropriately for use in the slack action where we can access it as (…)after <failures> attempts against <name>.(…) .
Done! Restart the fail2ban service again – then you should already receive the messages for all loaded jails on start.
Debug
If something doesn’t work there are some commands I can recommend:
Watch auth.log ( where the WordPress plugin writes login attempts to )
tail -f /var/log/auth.log -n 200
Watch the fail2ban.log ( all actions are logged here, ban, unban )
tail -f /var/log/fail2ban.log -n 20
List iptable rules and enumerate them.
iptables -nL
Delete iptables rule (you have to pass the right section and the right num)- you should also restart fail2ban service after this
iptables -D fail2ban-wordpress 1
Sources
The slack action is based on Tim Nash’s version
Thanks for this. Really really helped me sort out issues with a server that was being hammered by bots and hackers.
Is there a way to get whois information in Slack like we have it in email like country and location of the IP address?
Hi Steve,
you could send the IP to any whois service (preferably HTTP/REST API) and send the result to slack, too. E.g. https://hackertarget.com/whois-lookup/ Or (as stated on this site) just run
whoison your sever.