After spending quite a time, trying to set this up I have come down to the following things that worked for me, maybe it will help someone:
Duckdns
First create a duckdns account and setup the DuckDNS addon. If you have your own domain you can add a subdomain A record to resolve to your public IP and not use DuckDNS at all.
In the duckdns addon configuration add your duckdns Domain e.g. my. and set the tokenduckdns.org
Router
- Forward Port 80 on Router to Port 80 homeassistant IP.
- This is required for letsencrypt to reach your server in case of HTTP challenge mode. Otherwise you might not be able to obtain a certificate because letsencrypt cannot verify that you own that resource.
- Forward Port 443 on Router to Port 443 homeassistant IP
Home Assistant
In your configuration.yaml
http:
  ip_ban_enabled: true
  login_attempts_threshold: 5
  use_x_forwarded_for: true
  trusted_proxies:
    - 10.0.0.200      # Add the IP address of the proxy server
    - 172.30.33.0/24  # You may also provide the subnet mask
Nginx Proxy Manager
Now head over to Nginx Proxy Manager > Hosts > Proxy Hosts and add the domain.
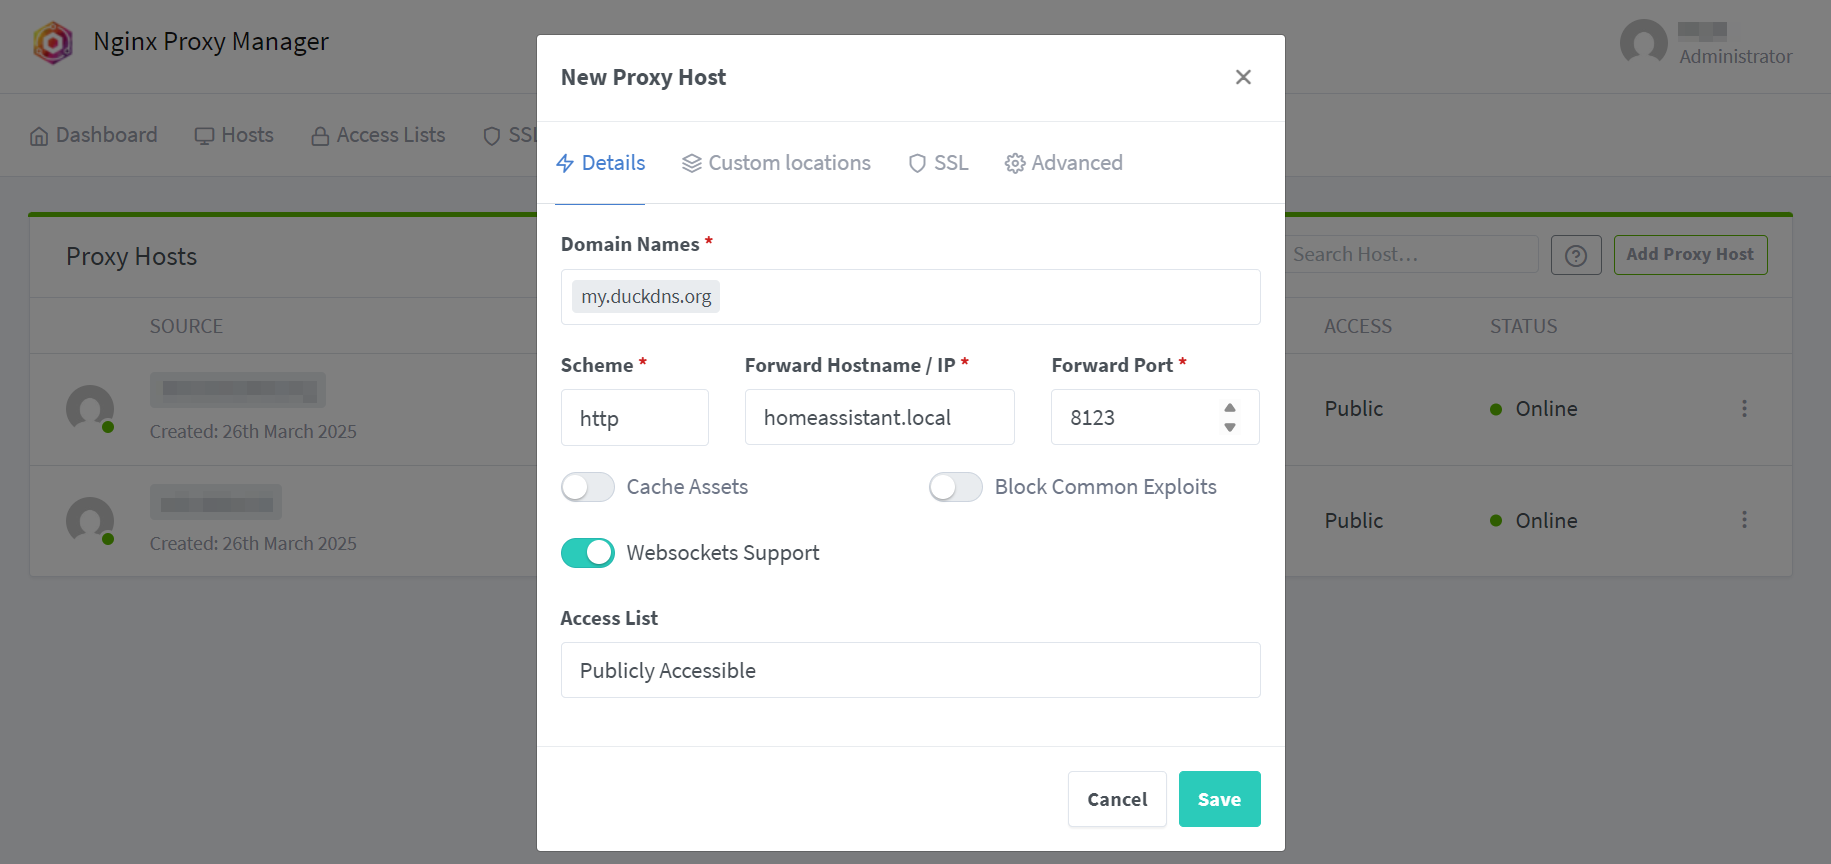
Set
- Domain names:
my.duckdns.org - scheme to
http - forward hostname/ip to
homeassistant.localor192.168.178.92(this depends on you network configuration and should be the IP of your homeassistant like you access it from your browser) - port to
8123 - enable websockets support
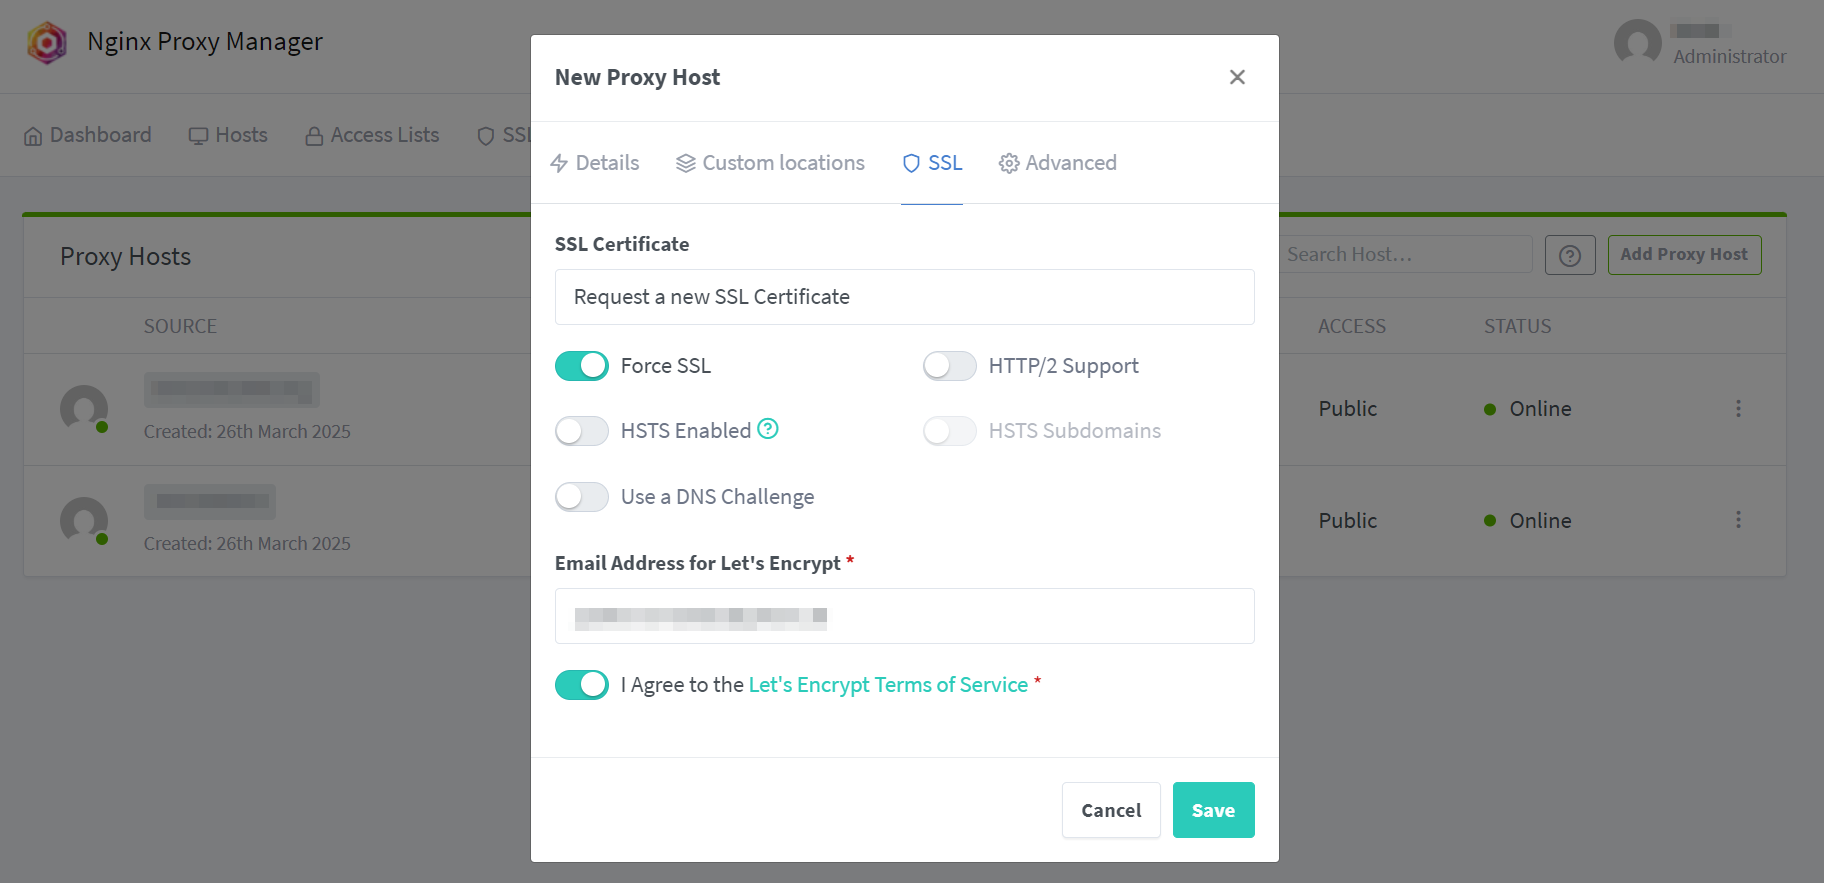
On SSL tab, select Request a new SSL certificate, select Force SSL and click save That should be it, now your homeassistant should be accessible at https://my.duckdns.org
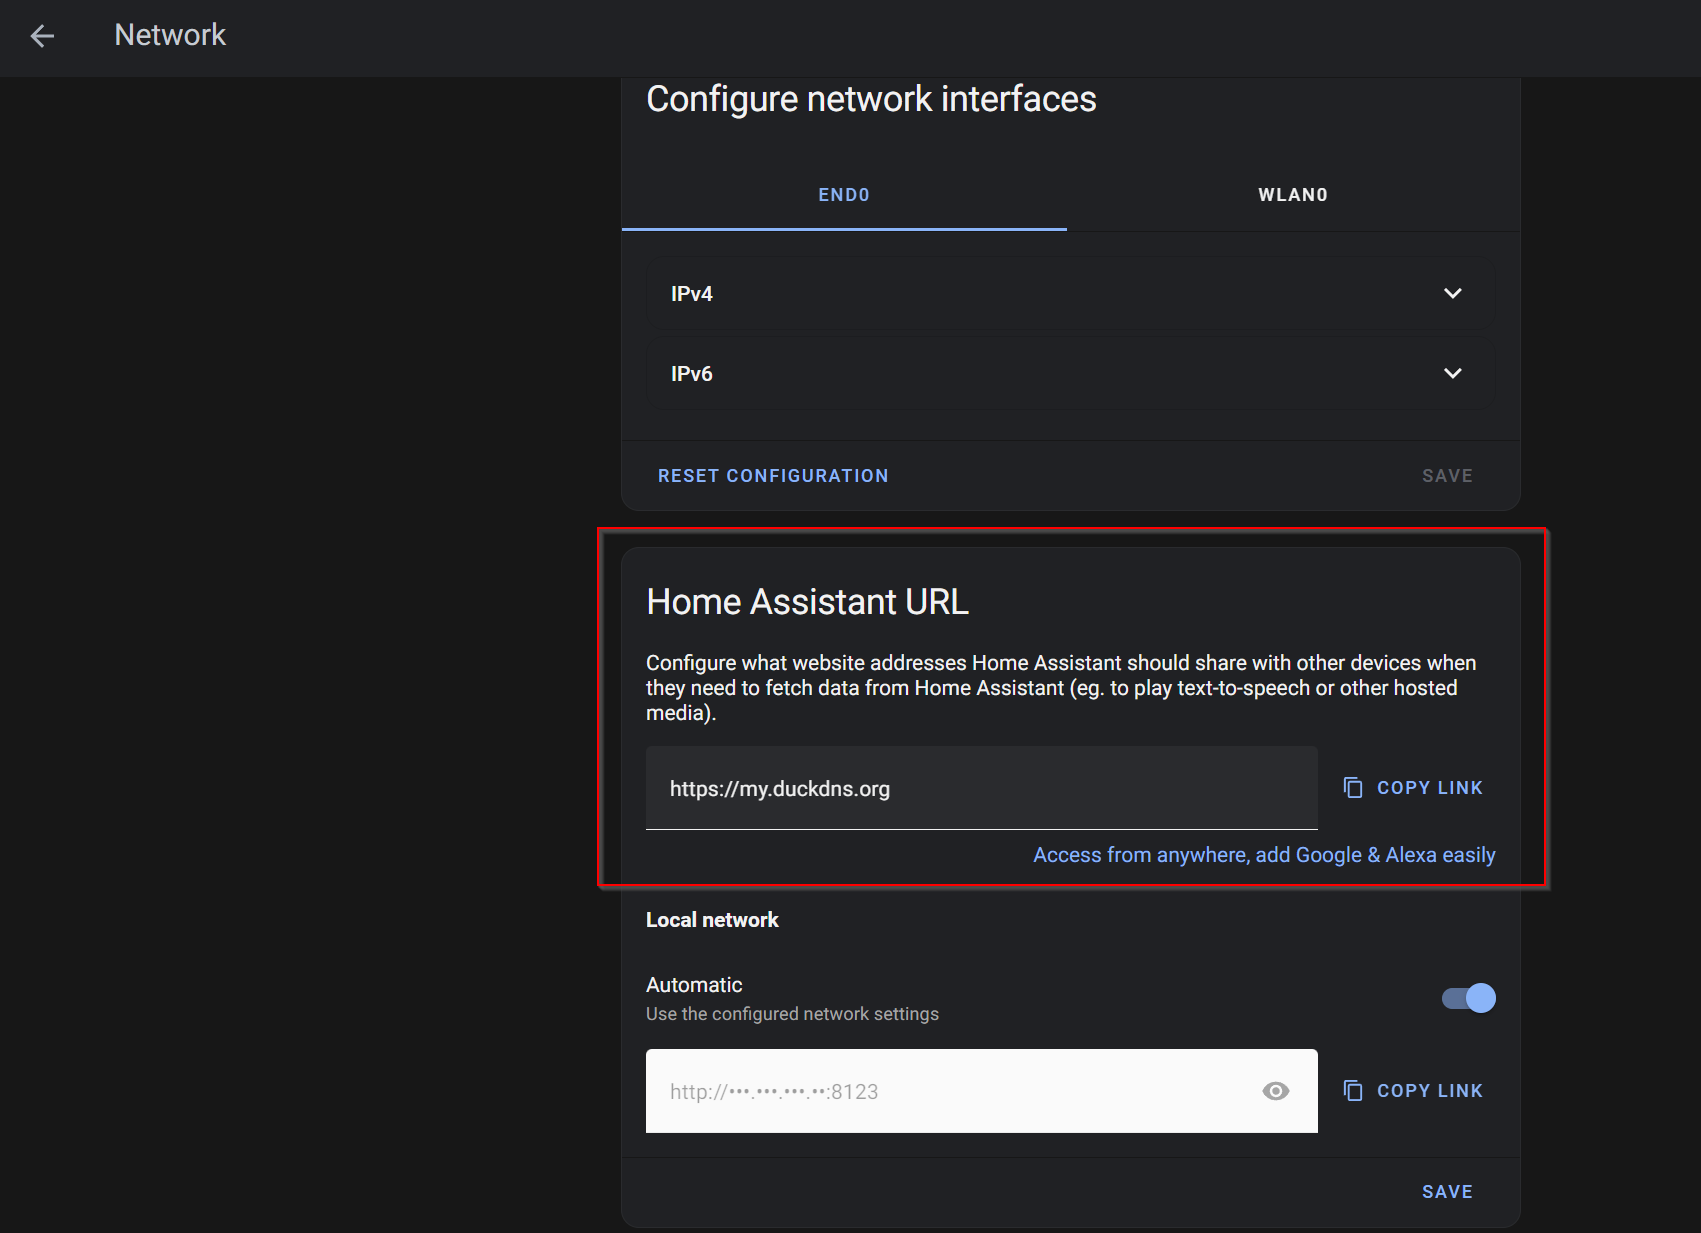
Home Assistant External URL
In Home Assistant settings > System > Network > Home Assistant set the external URL there to https://my.duckdns.org.